MITM Phishing in 2026: Bypassing 2FA with Evilginx 3
A full rewrite of my 2019 Evilginx post, updated for Evilginx 3.3 in 2026. We build it from source, fix the classic port 53 issue, pull a real Let's Encrypt cert and capture a session end to end on a live server, with simulated terminal and browser views of every step.
Introduction
So, way back in 2019 i wrote a post titled "MITM: Bypassing 2FA with Advanced Level Phishing Framework". It's one of the oldest articles i have and it has aged terribly. Freenom doesn't hand out free domains anymore, go get isn't how you install anything these days, and Evilginx itself got a complete rewrite. People kept messaging me that the old commands just don't work. Fair enough, this is the 2026 do-over.
This time i actually spun up a fresh server and built the latest Evilginx 3.3.0 from source, running the whole thing end to end while writing this. So every terminal view below is real output from a live box, not something i typed from memory. I've rendered those outputs as little terminal windows so you can see exactly what each step looks like.
⚠️ Quick disclaimer. Evilginx is a red team / pentesting tool. Everything here was done against a domain and server i own, using a throwaway demo login and fake credentials. Phishing real people without written authorization is a crime, full stop. Don't be that person.
What is Evilginx and why 2FA doesn't save you
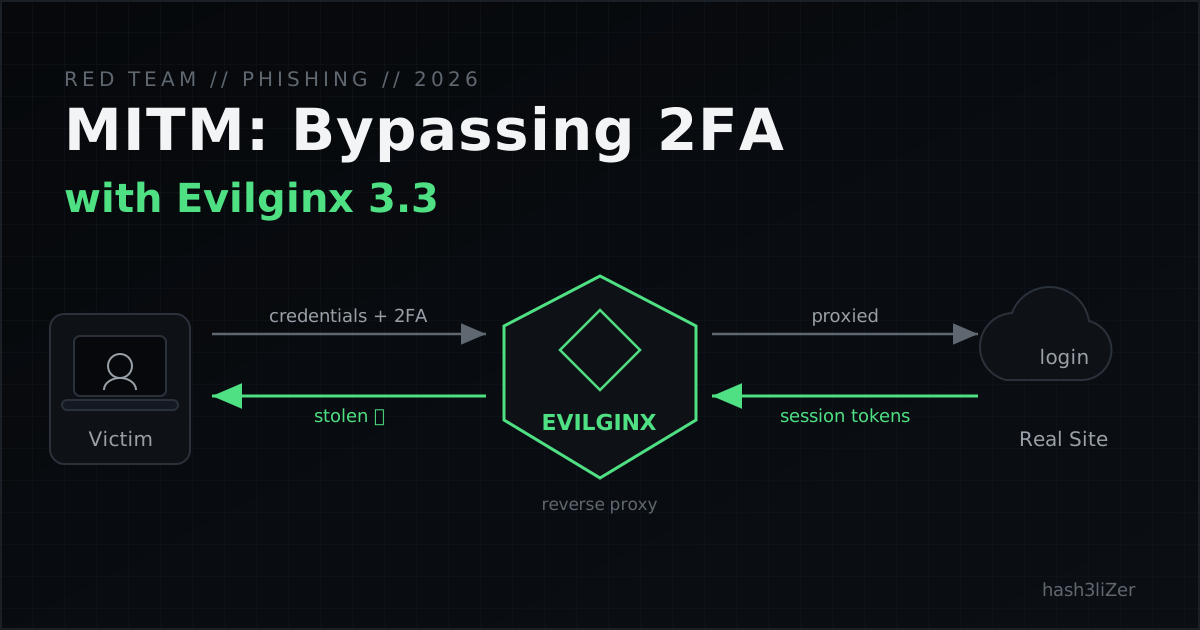
Evilginx is a man-in-the-middle reverse proxy. Instead of cloning a login page like old-school phishing kits (which never handle 2FA and break the moment the real site changes a class name), Evilginx sits in between the victim and the real website.
The victim talks to Evilginx, Evilginx talks to the real site, and it passes the traffic back and forth. Because it's a real proxy of the real site, the victim sees the genuine login page, the genuine 2FA prompt, everything. And here's the important bit: when the victim finishes logging in, the real site hands back the session cookies, the tokens that say "this browser is already authenticated." Evilginx grabs those on the way through.
Those tokens are issued after 2FA is already done. Import them into your own browser and you're in, no password, no second factor. That's the entire "2FA bypass". You're not defeating 2FA, you're stealing the thing that gets minted once 2FA is already complete.
What changed since the 2019 post
If you read the old article, throw the muscle memory away. In v3:
- Install:
go get github.com/kgretzky/evilginx2is dead. You build it from source withmake. - DNS: Evilginx now runs its own built-in nameserver on port 53. In 2019 we added CNAME records per subdomain by hand. Now you delegate the domain (or use a wildcard) and Evilginx answers for everything.
- No bundled phishlets. The repo used to ship dozens of ready phishlets. For obvious abuse reasons those were removed. It now ships a single
example.yamltemplate. - Lures. Phishing URLs are "lures" now, managed objects with their own paths and settings.
- Anti-scanner protection. A blacklist system auto-bans crawlers hitting your domain, plus an "unauth" redirect that bounces randoms to a URL of your choice.
Let's build it.
STEP 1 - The environment (server + domain)
You need a server with a public IP and a domain name.
For the server, any cheap VPS works. In 2019 i used DigitalOcean, this time a small Vultr box, but anything is fine. I'm on a fresh Ubuntu 26.04 instance with public IP 45.77.252.169. Make sure ports 80, 443 and 53 are reachable.
The domain part is where the old post is most outdated. Freenom is done, so no more free .tk domains. These days i use a cheap domain, or for quick lab work a dynamic-DNS provider. For this post i'm using miarosoft.theworkpc.com from Dynu, with a wildcard so every subdomain already points at the server:
getent hosts login.miarosoft.theworkpc.com
# 45.77.252.169   login.miarosoft.theworkpc.com
getent hosts anything.miarosoft.theworkpc.com
# 45.77.252.169   anything.miarosoft.theworkpc.com
That wildcard is going to save us pain in the DNS step. SSH in (my box gave me a sudo user, not root):
ssh arena@45.77.252.169STEP 2 - Installing Go and building Evilginx
Evilginx is written in Go, so we need the toolchain plus a compiler. Install the basics:
sudo apt update
sudo apt install -y git make gcc
Grab the latest Go, at the time of writing that's 1.27.1. Don't use the ancient apt version:
cd /tmp
wget https://go.dev/dl/go1.27.1.linux-amd64.tar.gz
sudo rm -rf /usr/local/go
sudo tar -C /usr/local -xzf go1.27.1.linux-amd64.tar.gz
export PATH=$PATH:/usr/local/go/bin
go version
Clone the repo, check out the release tag, and build. That's the whole thing now, no more go get:
git clone https://github.com/kgretzky/evilginx2.git
cd evilginx2
git checkout v3.3.0
make
It drops the binary in ./build/evilginx. Here's the build finishing and the version check:
STEP 3 - The port 53 problem (fix this first)
Here's the first thing that'll bite you. Evilginx wants port 53 for its DNS server, but on modern Ubuntu systemd-resolved already owns it. Skip this and you get:
The fix: tell systemd-resolved to drop its stub listener, then point the system resolver at the real upstream config:
sudo sed -i 's/^#\?DNSStubListener=.*/DNSStubListener=no/' /etc/systemd/resolved.conf
sudo ln -sf /run/systemd/resolve/resolv.conf /etc/resolv.conf
sudo systemctl restart systemd-resolved
Verify 53 is free and the box can still resolve names:
Port 53 is free, DNS still works. Now Evilginx can grab it.
STEP 4 - First run and configuration
Phishlets aren't bundled anymore, so Evilginx needs -p pointing at a phishlets directory. The repo ships one example.yaml, so point at the repo's phishlets folder. Run as root (ports 53/443):
cd ~/evilginx2
sudo ./build/evilginx -p ./phishlets
You get the banner and land in the interactive terminal:
Set your domain and external IP. This persists into /root/.evilginx:
Notice autocert is on, that's the Let's Encrypt integration about to get us a real cert. And unauth_url defaults to a rickroll, that's where anyone hitting your domain without a valid lure link gets sent.
STEP 5 - DNS setup (this got way easier)
In 2019 this was the annoying step: enable a phishlet, read off the subdomains it complained about, then hand-create a CNAME for each.
In v3 Evilginx runs its own authoritative nameserver, so the "proper" setup is to delegate the domain, register ns1.<domain> / ns2.<domain> glue pointing at your IP, then set the domain's NS records to those. After that Evilginx answers DNS for every subdomain automatically.
But if you already have a wildcard A record on the box (like my Dynu setup), you don't even need that. The wildcard resolves every subdomain to the server already, so your DNS provider handles it and Evilginx's nameserver never has to be authoritative. Lazy, but works fine for a lab.
STEP 6 - Phishlets
Phishlets are the heart of Evilginx. They're YAML files describing the target: which hosts to proxy, which cookies are the session tokens worth stealing, and how to spot the username/password in traffic.
Since nothing ships anymore, the bundled example.yaml is a great teaching template. It proxies academy.breakdev.org (Kuba's own Evilginx Academy, which is exactly why i'm using it, a safe author-provided demo target, not somebody's real login):
proxy_hosts:
  - {phish_sub: 'academy', orig_sub: 'academy', domain: 'breakdev.org', session: true, is_landing: true}
sub_filters:
  - {triggers_on: 'breakdev.org', orig_sub: 'academy', domain: 'breakdev.org', search: 'x', replace: 'y', mimes: ['text/html']}
auth_tokens:
  - domain: '.academy.breakdev.org'
    keys: ['cookie_name']
credentials:
  username: { key: 'email', search: '(.*)', type: 'post' }
  password: { key: 'password', search: '(.*)', type: 'post' }
login:
  domain: 'academy.breakdev.org'
path: '/evilginx-mastery'proxy_hosts- which subdomains of the target to proxy.sub_filters- string replacements applied to responses, this is how Evilginx rewrites the target's domain to yours inside HTML/JS so the victim never leaves your proxy.auth_tokens- the cookies you actually want, the session tokens that bypass 2FA.credentials- how to spot the username and password in POST data.
For real targets you write your own phishlet or grab a community one, but be warned: real phishlets (Microsoft/Google/etc) break constantly because those providers change their login flow all the time. There's no bundled Microsoft phishlet, and the public ones rot fast. Writing and maintaining your own is the real skill. Kuba runs a paid Evilginx Mastery course on exactly that.
STEP 7 - Assign a hostname and enable (real TLS)
Set the phishlet's hostname to your domain, then ask which hosts need to resolve to the box:
So our phishing hostname is academy.miarosoft.theworkpc.com, covered by the wildcard. Now enable it, and this is the satisfying part:
Evilginx just went to Let's Encrypt, proved it controls the hostname and got a real, browser-trusted certificate in about five seconds. No warnings, proper padlock. That's what makes the phishing page look legit.
And within seconds the internet finds your fresh domain, scanners like LeakIX and random crawlers. Because they hit the bare domain instead of a valid lure, Evilginx's unauth blacklist auto-bans them. This anti-scanner behaviour is new in v3 and it genuinely helps keep your infra off the radar.
STEP 8 - Lures (your phishing link)
A lure is the link you'd actually send. Create one and grab its URL:
That random path (/HMMolUHQ) is the secret token. Only people with the full link get the real page, everyone else gets blacklisted and redirected.
STEP 9 - Exploitation: capturing a session
Now let's play the victim. Opening the lure transparently proxies you to the real login page, over valid HTTPS, on the phishing domain. This is what the target sees, note the padlock and the address bar:
The moment i landed, Evilginx registered a new visitor and opened a session. Then, as i submitted credentials (fake ones, this is a demo), it matched the credentials keys and ripped them straight out of the POST:
And the session shows up in the table:
There's the credential capture, live, on a real HTTPS phishing domain.
A note on the tokens (the actual 2FA bypass)
You'll notice tokens : empty above. That's because i logged in with fake credentials, so the real site never authenticated me and never issued a session cookie. On purpose, i'm not compromising a real account for a blog demo.
In a real, authorized engagement this is the money shot: when the target enters genuine credentials and completes 2FA, the real site sends back the session cookies. Evilginx matches them against the auth_tokens list and stores them under tokens. You'd dump them with tokens 1, drop that JSON into a cookie-editor extension in your own browser, load the site, and you're logged in as the victim, no password, no 2FA challenge, because the cookie already represents a fully authenticated session. That is bypassing 2FA. You never broke the second factor, you just walked in with the pass it printed.
STEP 10 - The new defensive / opsec features
A few v3 things that didn't exist in 2019:
blacklist- modes likeunauth(ban anything hitting outside a valid lure),all,off. Keeps scanners out.config unauth_url <url>- where non-victims get redirected. Change it off the default rickroll.- Redirectors - custom HTML landing pages (
redirectors/folder) you attach to a lure, e.g. a fake "loading" splash before the real page. - GoPhish integration - Evilginx can plug into GoPhish for campaign tracking, see the
gophishfields inconfig.
Conclusion
Seven years on and the core idea hasn't changed: a reverse-proxy MITM sees everything the victim sees and grabs the post-auth session tokens that make 2FA irrelevant. What has changed is the tooling, v3 is cleaner, more capable and better-defended, and the whole install / DNS / cert dance is honestly nicer than the 2019 version once you get past the port 53 gotcha.
If you're on the blue side, the takeaway is uncomfortable but important: SMS and app-based 2FA do not stop this attack. The only real answer is phishing-resistant auth, FIDO2 / passkeys / hardware keys that are cryptographically bound to the real origin, so a proxy domain simply can't complete the handshake.
And once more, because it matters: only ever run this against systems you own or are explicitly authorized to test. Tear your lab down when you're done.
Thanks for reading, and sorry it took me seven years to update this one. 🖤